Sunday 30 September 2012

Fabric Flowers

It's a little while since I made something for the blog, and I thought as the flowers were fading in the garden it would be nice to make some fabric flowers.


These are quite simple, and although I use the sewing machine here they can be made by hand- there isn't a great deal of sewing involved.

You need-

Strips of fine or light weight fabric- I've used a cotton fabric.

fuse wire (or the fine wire used by florists in flower arranging)

plant sticks/canes ( thin green wooden sticks- found mine in B&Q)


Cut a strip of fabric 10 cm by 50cm and fold in half - bringing the long edges together and press along the fold. 


Open the piece of fabric out and make a running stitch along the length using the pressed fold line as a guide.


Fold the fabric back along the pressed fold line.

Now to make the petal shapes- fold the fabric strip in half  bringing the short edges together, you should end up with a folded piece measuring 25cm by 5cm.  It is probably easiest to use a few pins to hold the fabric in place.


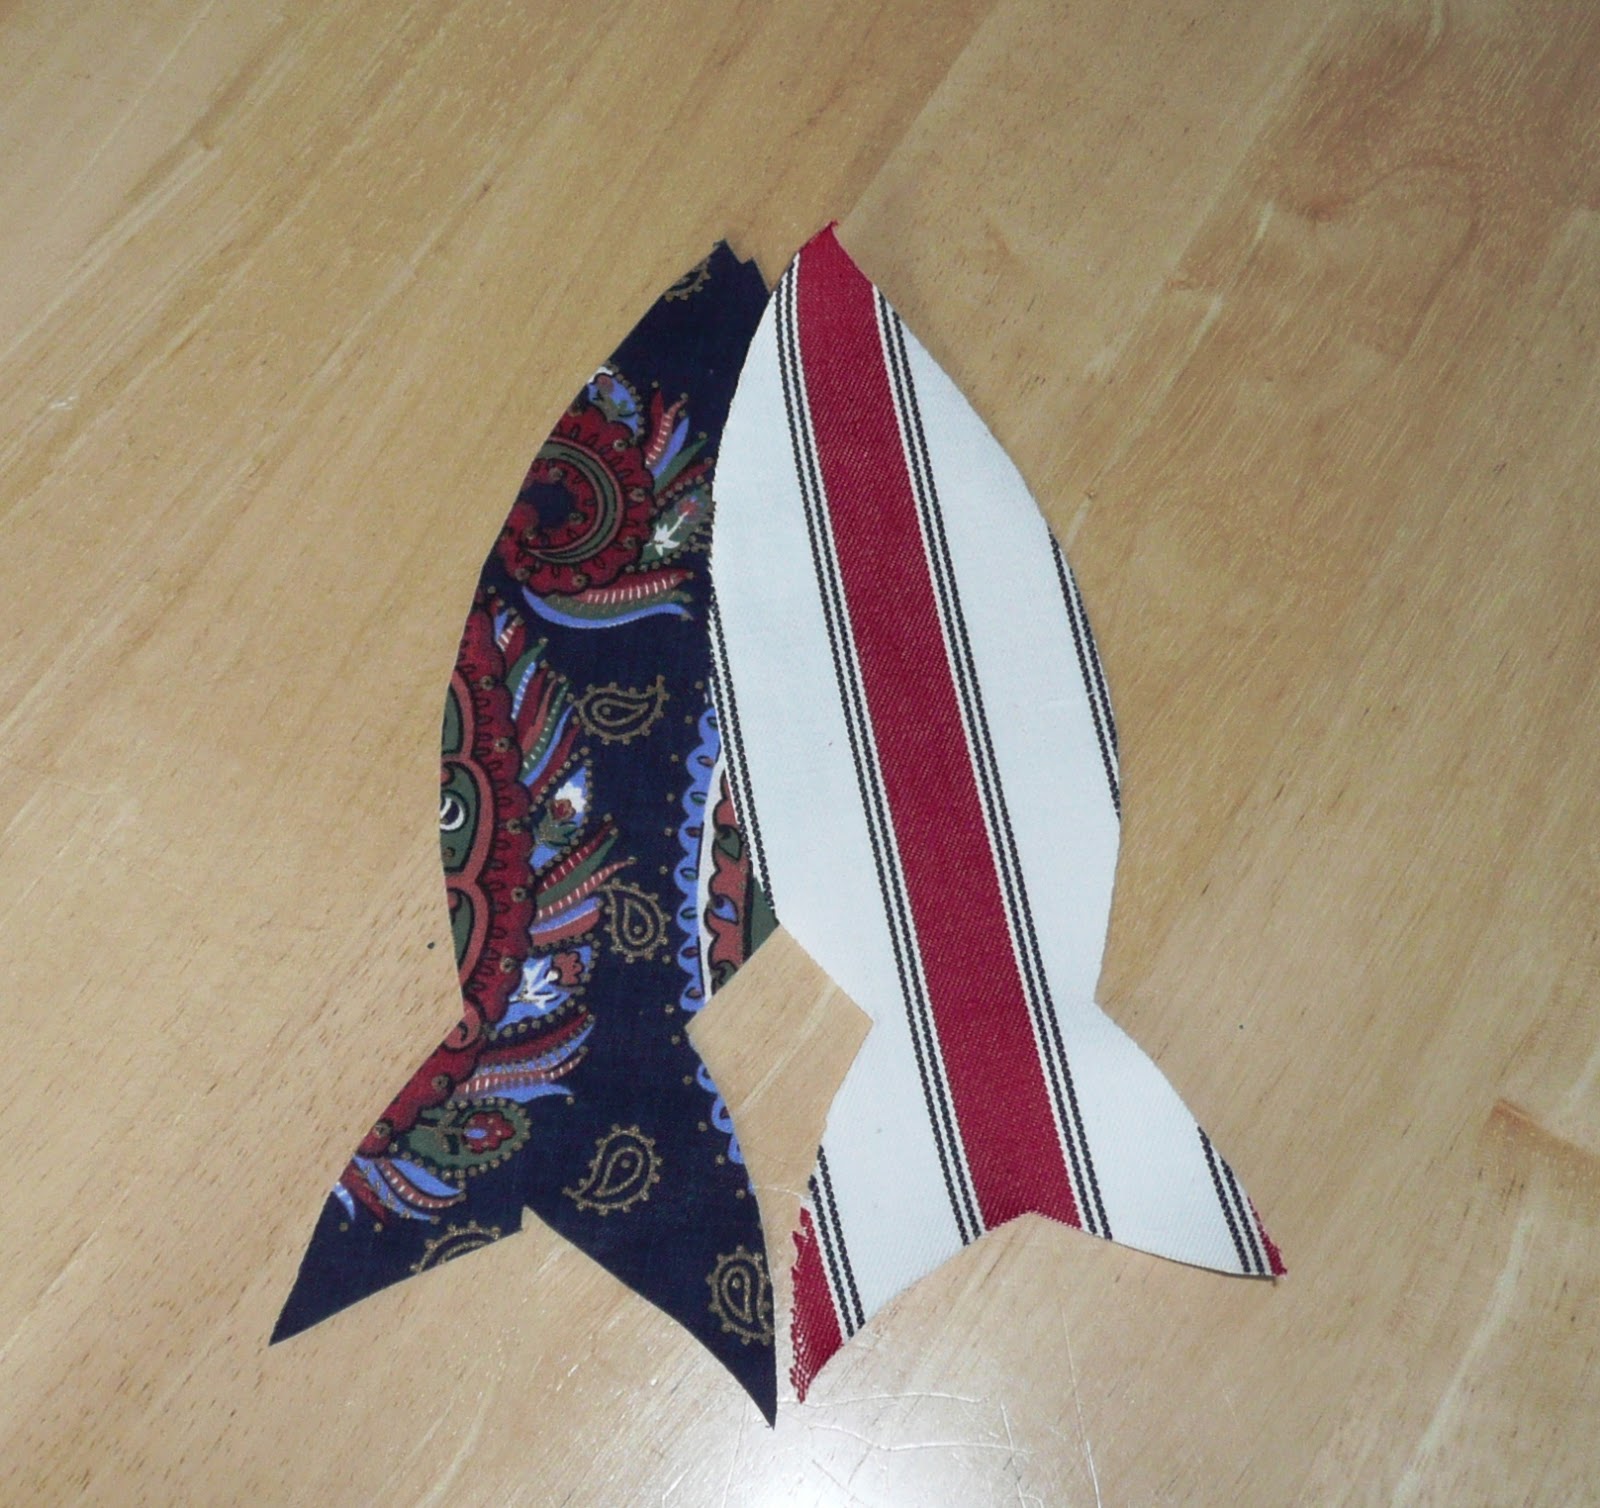
You can either draw the petal shape free hand or make a template.


 Mark the shape on the fabric- ensure the you do this along the open edge of the fabric and not the fold!


Cut the petal shapes (reminder don't cut along the folded edge)- once done open out maintaining the fold on the long edge.

Again you may wish to use pins at this stage, stitch the two layers of fabric together, either with the machine or by hand, along the open edge of the 'petals' about  0.5cm from the edge.


Now to secure your flower to its stalk- the green garden canes. The ones I have are 25cm in length, and I've cut them in half. You can hide the cut end in the centre of the flower.

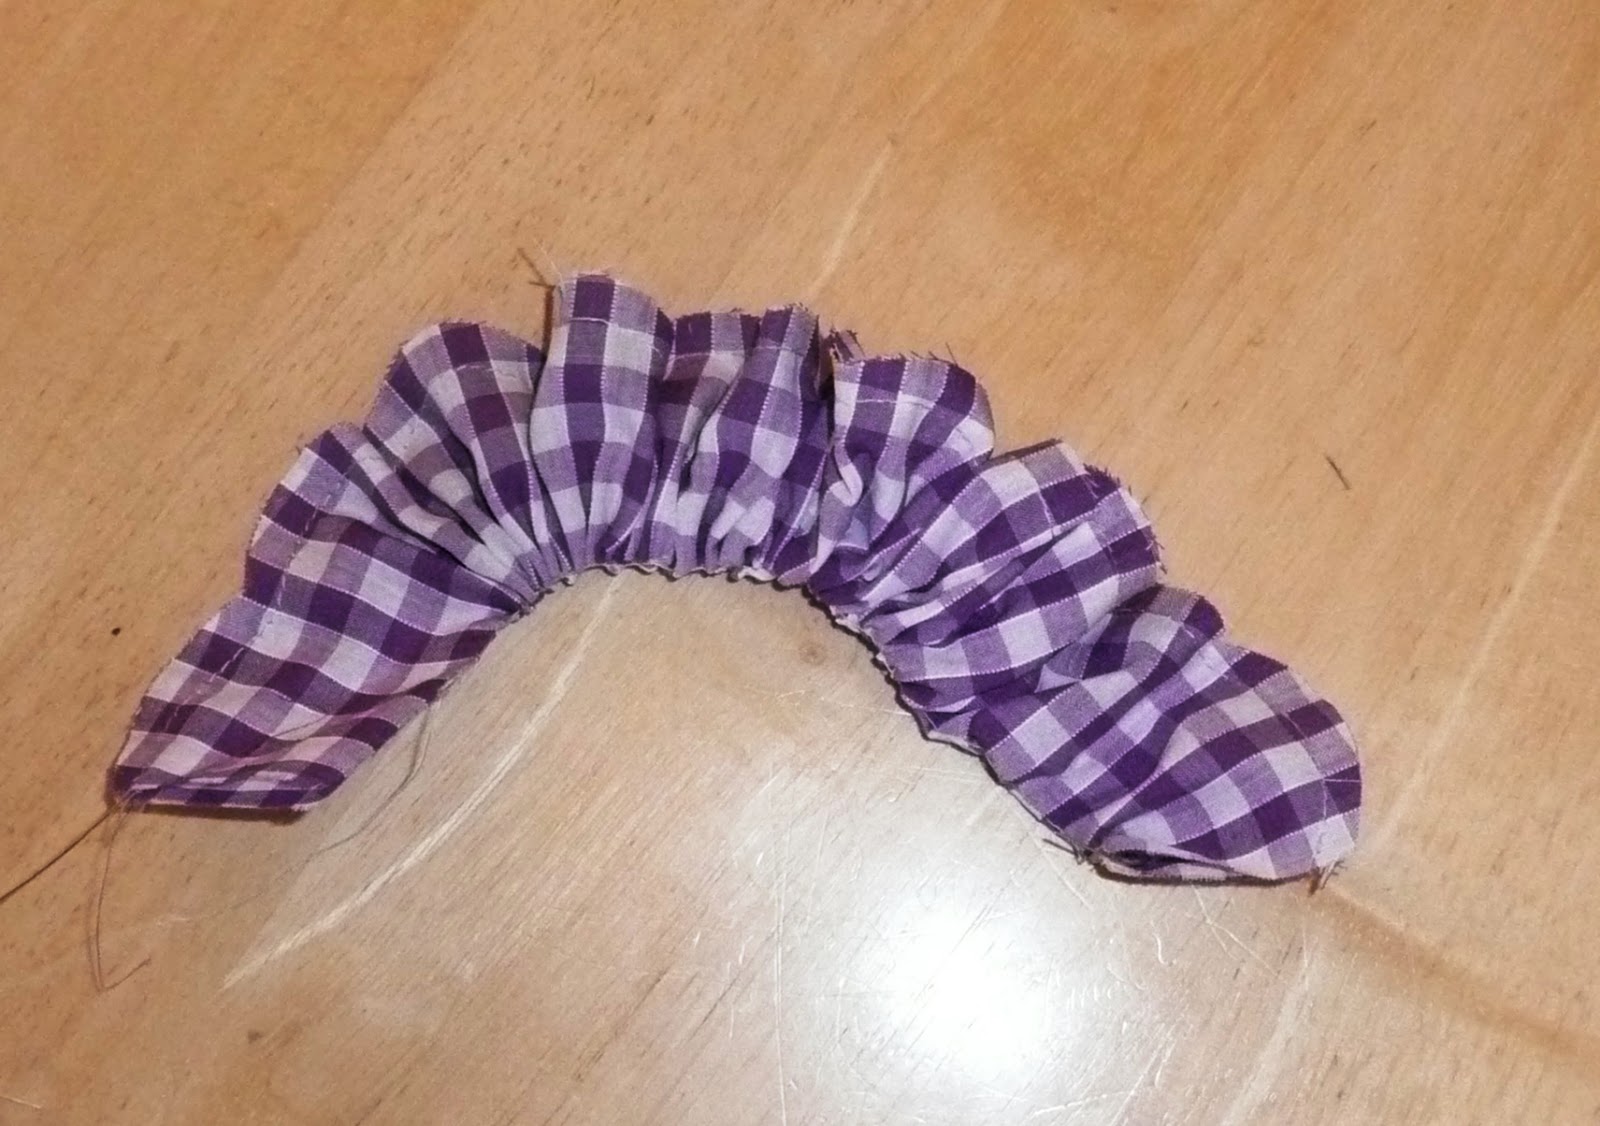
Thread a piece of fuse wire through the fabric strip bringing it out the other end a couple of centimetres, bend either end of wire to stop fabric coming off it, then draw up the running stitch.


Secure one  end of the fuse wire to the end of the cane.


Then carefully start to form the flower head by wrapping the fabric strip round the top of the cane using the fuse wire to secure it.


 It's a bit fiddly but it should hold in place if the wire is tight-  take a bit of time here to shape the flower head. Once you reach the end secure using the wire.


Like previous projects you can modify this:
- change the dimensions of the fabric strips of create bigger/smaller flowers
-change the petal shape so you have more pointed petals or cut out using pinking shears
-instead of folding a strip of fabric use 2 long thinner strips of different fabrics sewn together, fold along the length of the seam.
-you can add leaves to the stems, again using wire to secure in place.


Tuesday 25 September 2012

Vintage Fashion & Textiles -My Kind Of Heaven

Had the most fantastic Sunday spending it at a Vintage Fashion & Textile Fair in Manchester. The fair is held twice yearly at the Armitage Centre in Owens Park, which is part of Manchester University although the fairs are not organise by them. The spring fair is organised by The Textile Society and the September one by Decorative Fairs  It is an absolute must for anyone who has an interest in vintage/retro fashions and textiles with literally hundreds of stalls there. I had the most wonderful time mooching and rummaging, and meeting lots of folk who enthuse about fabric.
 
No photos from the actual event- far too busy looking (& spending) to take photos, but I thought I might share some of my buys (and there were a few she confesses guiltily).  They are all favourites but for different reasons, and some I didn't realise how much I loved  until I got home and had a really good look.

 
I bought a collection of knitting needles- when I picked up the bundle I didn't realise what was in it until I unwrapped it and found the most beautifully organised set of knitting needles. They had obviously belonged to a serious knitter- needles of all sizes in bamboo, metal and plastic, in various lengths and many double ended needles. To me a wonderful find, and scrutinising it when I got home it was difficult not to think about the previous owner and what they had made in the past. I'm afraid I get a little sentimental and feel it's a real privilege to take possesion of such an item.


Another purchase was a bumper tin of buttons- I was offered the box , the price was named and I have to say it was too good to resist. I hadn't the time to fully examine the contents of the tin there and then but I had a wonderful time going through the box when I got home, and wasn't disappointed.


 There were lots of sets of vintage buttons all sorts of sizes, a few novelty buttons and some glass buttons. I think the previous owner must have taken buttons of clothes once they had finished wearing them and stashed them for future use in their button tin- something I do myself.

 I wondered what they did with the rest of the items whether they were re-fashioned into other pieces of clothing or whether they were used to make something like another one of my purchases- a peg rug.


I said this was post was a bit of a confession, and it is. I found and brought home this fantastic peg or rag rug, what it's called depends on what part of the country you come from. These rugs like patchwork were made from bits of old and used fabric- the ultimate recycling. Many of the rugs haven't survived, or when you do find them they tend to be marked and damaged as they were made to be used and usually sat in front of the fire.


 This one is made from pieces of wool fabric, and someone has spent some time planning and designing the rug. It is in need of a little T.L.C and a wash but otherwise is just perfect. So I'm delighted with this and am going to give it a good home.
 
I won't list all my purchases as it is becoming a little self indulgent but I thought I might just show you this lovely wool jacket I picked up  (an absolute bargain ).


 It is beautifully made and finished- I just love the detail in the tailoring of the jacket particularly the sleeves, the pleat in the back and finish around the pockets and front seams.


It was absolutely wonderful to wander round the fair and look at the most exquisite dresses, outfits and accessories of all vintages, and fabrics and textiles again of all vintages from all around the world. 
 
The next fair in Manchester is in the spring and for details go to the Textile Society website- there is a bonus at their fairs as many of the textile guilds are also there including embroiderers and quilters along with the commercial sellers .Decorative Fairs do organise other fairs in the northwest of England and again more details will be found on their website.
 
Thanks for hearing my confession and perhaps I've even tempted you to indulge your passion for textiles and vintage fashion. If you feel the need for a little indulgence I would really recommend a trip to one of the fairs. 


Saturday 15 September 2012

Ruby Gingham @ No16 The Downs


It's been quite busy the last few weeks in that I've been setting up my little patch in a fantastic new retail venture in Altrincham, a market town in Cheshire not far from Manchester. It's a place I know well having grown up there, and I'm a very frequent visitor still having family ties in the area. Like many small towns the last few years have been difficult, but now there's a fantastic movement to reinvogorate the town and bring back local shoppers. No 16 The Downs  can be found on the first floor of Traders Outlet on The Downs, and it provides the opportunity that a lot of crafters and small independent traders dream of- retail space at low risk.
 
 
So what can you find there? Well there is a fabulous selection vintage clothes & home wares, artists, and crafters plus a beautician and importantly a coffee shop with cakes (absolutely vital to any shopping trip). There is a real mix of independent traders and a very pleasant relaxed atmosphere to shop in.
 
 
My little patch that has been a bit of challenge to set up and stock- I'm use to setting up my stall at fairs and markets more or less on a weekly basis but this is a bit different. Firstly there is quite a bit more space and also I won't be on hand most of the time to keep it tidy- so planning it was important to make the most of the available space and incorporate some storage space. With the help of some magnolia paint, some Ikea shelving units and a very 'shabby chic' chest of drawers the space has evolved into my patch, though even after couple of weeks trading it's still a work in progress.


Ruby Gingham at the Crafty Little Cottage now has a home away from home at No16. It's great to have a place to display my work on a more permanent basis, and to be part of such an exciting venture.


So now there's is a lot of work to get the word out there and increase the awareness of the place. There has been a lot of coverage in the local press and last weekend No16 had its official launch. There was a tremendous response and the place was packed which was wonderful- here's hoping folk keep coming back and tell their friends. So fingers crossed...
 
Find out more;


Monday 6 August 2012

Blooming Summer


I've just spent a lovely weekend in a marquee in the beautiful gardens of Erddig, a National Trust property in North Wales. It was real privilege to take part in their wonderful Victorian weekend, which was very well attended and it was fabulous to see so many folk wearing Victorian costume.

I was last at Erddig at their Christmas market, so it was great to see the beautiful gardens that I wandered round in the depths of winter in their summer splendour. One of the things I love about doing events at this type of venue is the opportunity you get to mooch round before the gates open to the general public. I took full advantage of this yesterday morning and had a good look round the gardens before starting.


I always feel I have to excuse writing about gardens in what is suppose to be a crafting blog but they can be a great source of inspiration particularly with regard to the use of colour and textures.


There were plenty of colours to be seen at the weekend in the fabulous rose garden. The beds are planted quite formally with roses and lavender, and purple clematis and pink climbing roses growing up frames.


There is a great selection of sweet peas (one of my favourites) in the garden and the smell was wonderful. The picture above is of the walled vegetable garden, and in true Victorian style there are a couple of greenhouses tucked away and an orchard.


There are lots of ideas to take away for planting and surprisingly in such a big garden ideas for gardeners who work on a much smaller scale. The bed above has sweet peas, sunflowers, beans, purple sprouting broccoli, beetroot, marigolds and a cordon of apples on the wall.


I loved seeing the bees working hard in the orchards and they were busy yesterday in the early morning sunshine.


All in all it was a terrific weekend in a wonderful setting and the sun shone- at least for most of the time.


Tuesday 24 July 2012

Accessorise with a yoyo- easy brooch make

I've just spent a lovely weekend in Sheffield taking part in the Folksy Fair. This was a wonderful craft and design fair organised by Folksy, the on line craft site (www.folksy.com ) and involvied individuals who sell on the site. The event was held in Endcliffe Park and was part of the Folk Forest music festival, so over the weekend there was a selection bands playing just adding to a really great atmosphere. There was a really good attendance and for a change this summer the weather played nicely giving us some brilliant sunshine ( and I have to admit I was even a little sun burnt by Sunday evening).


I was surrounded by some terrific designers and makers, and it was great to meet them after admiring their work on line. All in all a very good weekend.


When I wasn't talking to visitors and admiring other stalls I did a little making as I took some sewing with me. I think it looks good to be busy behind your stall. This is something I should add to my list of things to take to a fair -it nice at fairs to be demonstrate your crafting skills to visitors if you can. Unfortunately the sewing machine doesn't travel well so I usually take some hand sewing, something small that is is easy to put down and doesn't take too much concentration. This weekend I made some little fabric brooches while I was sitting behind the stall.

This is an incredibly simple idea and very easy to do, and like many things I mentioned previously easy to adapt and develop. The basis of the brooch is a 'yoyo' or I've also heard them called 'suffolk puffs', I think the names are quilting terms although I may be wrong.


The basis of the brooch is a circular disc of fabric, the size of the disc determines the size of your brooch.


 Sew a small running stitch around the edge of your disc about 0.5cm from the edge.  Running stitch is a very simple in and out straight stitch, make sure the end of your thread is well secured when you start sewing so when you have completed stitching round the edge of the disc and pull the thread the fabric gathers up.


This will bring the outside edge of the disc together, make sure the right side of the fabric is facing outwards, and manipulate the fabric disc so the gathered edge sits in the centre of the disc and secure and trim the thread.

Add a button and sew on centrally to hide the raw edge. Then you can just attach a brooch bar or a small safety pin to the back so you can wear your brooch.


So what about adapting the idea;

-you could sew a couple of yoyos in complimentary fabrics (one larger than the other) on top of one another to make a bigger brooch.


-the yoyo with the central button resembles a flower so you could make some green felt leaves and sew them to the back of the yoyo before adding your brooch bar.

-to accentuate the shape of your yoyo flower you could add a little stuffing, do this as you are drawing up the running stitch so you can secure the stuffing inside.

- you could sew several together so it appears to be several flower heads together, use a piece of heavier fabric or heavy interfacing to sew the yoyos to then sew your brooch bar to the back of this piece of fabric.

-rather than making a brooch sew several yoyos together and make up into a necklace.

This make is another way of using up scraps of fabric- the brooches (or if you developed the idea your yoyos may have multiplied to a full blown corsage) are great on jackets, cardis, hats and even bags. I've started adding these brooches to some my bags- making them up it the same fabric as the bag lining and using some big interesting buttons in the centre of the brooch. It is actually quite a nice way of showing off  vintage, antique, or just nice buttons.


Saturday 7 July 2012

Crafty Fairs


     I’m now becoming a bit of an old hand at craft fairs now that I’m into my third summer.  I wouldn’t call myself an expert but I have learnt a lot from experience and have to say I’m still learning.  I don’t think people often realise the preparation that goes into a fair, and I’ve found that really getting organised makes for a better fair.  I have a list of things I take, it’s fairly generic with a few things that I need specifically for my stall. 

      List of craft fair musts:-

·         Directions to the fair!! Remember your map or sat nav.-  don’t give yourself unnecessary  stress by getting lost on the way

·         Pens

·         Pad of Paper for notes

·         Labels

·         Scissors

·         Receipt book- some people do asks for receipts

·         Bags- the size and type obviously depends on what you’re selling

·         Business cards- I always have a few lying at the front of the stall.  People may not buy from you then, but give them the opportunity to come back to you particularly if you sell online. I always look at fairs as a marketing opportunity. I think it is really important to remember that customers put a lot of trust in you if you are making your own products and a fair is the chance to see the quality of your work and to see YOU (it’s important to remember you are an important part of your product- so it’s worth remembering to pack a smile on fair days)

·         Cellotape/ sticky tape

·         String

·         Safety pins

·         Table covering- some fair organisers insist you have something that covers the stall to the floor on three sides of the table just to hide the stuff you’ve hidden underneath it.  It does in fact make the stall look tidier and more professional.

·         Float- cash for change. I find the amount you need depends on the size of the event and it is always as well to be prepared- it is frustrating to lose a sale because you haven’t enough change.

·         Copy of your public liability insurance- the fair organiser may ask to see it.


If you’re at a fair in a tent, in a field, it is useful to have tarpaulin to put under the stall to protect your stock and your feet.  Another tarpaulin is useful to cover your stall if you leave it set up overnight, particularly if you’re in a tent- they are not always water tight and even if it doesn’t rain they can get damp overnight just with condensation or dew.


I always try to keep extra warm clothes, waterproofs and wellies in the car- I’ve just been reminded of this as I listen to the rain coming down in stair rods outside.


I find that the clear heavy duty plastic boxes or crates are the best things for transporting stock and storing it under the stall. They stack more easily, they are great for protecting your stock and the clear boxes make it is easier to see what’s in them when you’re looking for something.


Things to consider taking:-

·         Clothes pegs/ pins

·         Screwdriver- OK possible over the top but worth considering. I have a clothes stand that needs to be assembled for the stall so a screwdriver is quite important.

·         Chair- it’s worth checking whether or not a chair is provided. Possibly more important check that a table is provided. It may be that you are renting a space and the table is not provided or is provided at extra cost. A chair you can manage without but it’s more difficult to manage without a table. Most organiser usually do make it clear what you are getting when you book a stall.

·         Drawing Pins

·         Stapler

·         Blu- Tac


The list could be much longer I suppose and obviously you need to adapt it to your own needs and requirements- it would be interesting to know what must haves other folk have on their list.


I like to take a flask of coffee, some snacks and a packed lunch- this is not to say they are always eaten but it gives you options particularly if there is a lack of, or limited, onsite catering, and (here’s the miser in me speaking) it also means that you don’t go and spend your precious take on food. There is often enough temptation to spend your money at other crafters stalls.

Now off to get organised for another event...

Sunday 1 July 2012

Something Fishy to Make

There is a strong smell of lavender through the house at the moment as I've just spent the last few hours filling lavender bags. Yesterday I took delivery of a 3Kg box of the stuff ( which is quite a lot I now realise).
Filling lavender bags is always an enjoyable job, I love the stuff and make lots  (& lots & lots) of lavender bags in various shapes and sizes. The lavender fish are still very popular...


The fish are quite simple to make and they don't need to be filled with lavender. They could be filled with dried rose petals or just ordinary toy stuffing. They are great fun and look fab hanging up.

The pattern is quite easy to make- I find it is usually easier to start with a pattern although you could probably do this free hand straight to the fabric.


I mentioned lines of symmetry when I described making my pirate applique a few months ago. All you need to do is fold a piece of paper in half lengthwise (use the fold as your line of symmetry) then draw half a fish. You can put a few marks to guide your drawing -decide how long you want your fish to be,  length of the tail  and how fat you want your fish!

 Remember to include a seam allowance, I would suggest about 0.5cm, and also not to make the  gap at the point between the tail and body too narrow  as you need to be able to turn the fish right side out once you have sewn it together.


Cut out a front and back for your fish- place them right sides together and sew round with a seam allowance of about 0.5cm. Remember to leave a gap of about 3cm so you can turn the fish out.


Clip the corners at the nose and tips of the tail. Clip round the curves, this ensures that the fish retains its fishy shape when you turn it out- I go round with pinking shears. Take care that you don't accidentally clip the seam stitching!


Turn the fish out, carefully pushing out the corners- the blunt end of a crochet hook is quite useful for this job.

Add the string loop for hanging- easiest to do before stuffing the fish. This fish has been filled with polyester toy filling. Close the fish by hand stitching the gap used for stuffing the fish, ensure the raw edges are all tucked in.


This little fish has been embellished with button eyes (one on each side) and a simple quilting stitch on the tail.

The fish are more effective hanging up in groups...


For cat lovers out there, what about a treat for your cat? You can fill the fish with catnip and your cat will love you forever! Just a few words of caution, I would suggest using a strong tight weave cotton fabric for your fish, and to omit the button embellishment or any other embellishment that may accidentally end up inside kitty.